
Now that an official drought has been declared in California, many people remind themselves that “When it’s yellow it’s mellow; when it’s brown flush it down.” That was fine and well during the days of toilets that used nine gallons of water to keep waste moving. With today’s modern toilets that use between one and two gallons, however, flushing each time is crucial.
About five years ago, we remodeled a client’s bathroom and installed a Toto wall-mounted dual-flush toilet. She figured that she could save even more water by not flushing when it was not absolutely necessary. As a result, the lack of water prevented toilet paper from moving along, and began to accumulate in the sewer line. Eventually the line clogged, and a plumber was needed to fix the problem. Contrary to typical floor-mounted models, a “snake” can not be used with the wall-mounted type. The toilet had to be removed and reinstalled. Save yourself the unnecessary expense and headache. If you have a low-flow toilet, be sure to flush after each use.
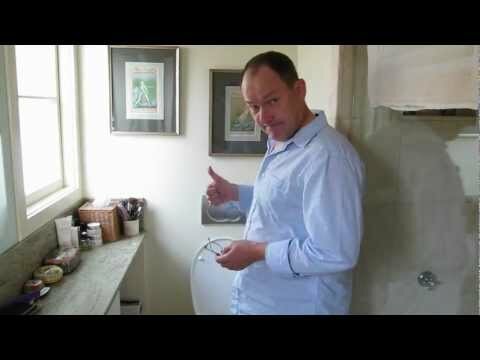
Oh, the photo? It is a poo-powered motorcycle, called the “Toilet Bike Neo.” Toto says it wants to raise awareness of water waste. There are no plans to make this bike available commercially.
]]>
While replacing electrical wiring during a recent whole-house remodel, a fan switch had to be installed in a tiled bathroom wall. There were no spare tiles, so great care had to be taken to not cause cracks or other damage. With the right tools and a steady hand, here’s how to accomplish that task without too much trouble.
- First make an outline of where you want to cut. Use a Sharpie or similar marker that will not smudge.
- Cover the top and bottom marks with masking tape as shown. Trace the lines still visible under the tape, so you can see the lines clearly when you cut.

The purpose of the masking tape is to help keep your drill bit in place. The glazed surface of tile is so slippery that the tip of a drill bit is very likely to wander off.
- Be sure to use a bit that is meant for drilling into tile. Carefully drill a hole in each corner of your outline. The reason for the holes is to prevent having to over-cut the outline beyond the surface that will be hidden by the cover plate.
- Using a 4″ grinder fitted with a diamond blade, start making cuts in the tile. Unless you are certain there are no ‘live’ electrical wires or plumbing pipes behind the tile, keep the cuts as shallow as possible. You can probably use much cheaper carborundum blades instead of diamond. Buy several, as these blades will wear down quickly.
- Keep a close eye on the depth of the cuts, and be prepared for lots of sparks and a glowing blade edge. If this is your first time, keep a fire extinguisher handy. If this is your 100th time, do the same. Be smart, not clever.

- It is to be expected that this procedure will generate a lot of dust. Wear goggles, ear protection, gloves and a mask. Open the window if you have one, turn on the fan, and, well, you get the idea. What you see in this photo are not cracks caused by our work, but rather crazing in the glazed surface, accentuated by dust from the diamond blade. With a narrow-tipped cold chisel or flat-blade screwdriver carefully chip away the tile inside the outline.

Unfortunately there is some framing that had to be chiseled away. I recommend drilling a series of holes with a new 1″ spade bit, and then chiseling out the remainder with a sharp chisel. Be gentle, try to avoid vibration as much as possible, and all will be well.
Any other ideas or tips? Please share!
]]>
In a couple of weeks, we will start a second floor bathroom remodel in a 1930’s Spanish-style home. We plan to cover this project from A to Z with video and stills, and will share tips and tricks of the trade. Here is a brief description of what will be happening.
We will remove:
- A portion of lath & plaster wall and ceiling
- The entire tiled floor and mortar bed
- ‘Thirsty Throne’, an ancient, water-guzzling toilet
- Old plumbing and knob-and-tube wiring
Then we install:
- New framing to prepare for a dual-flush toilet with in-wall tank
- Blocks to ‘back’ new drywall, towel racks, and so forth
- A super-quiet, low-voltage exhaust fan plus sheetmetal ducts
- A new electrical circuit, GFCI receptacle, and switches
- New recycled cotton insulation
- Cool wallboard that does not contain any paper
- The subfloor, cement board, and ceramic tile
- A brand-spanking new wall-mounted toilet
That just about sums up what is on drawing board right now. You will see the tools that are best for each part of the job, and best of all, you are encouraged to asked questions about what’s going on. Stay tuned!
For quite a few years now, the installation of so-called low flow toilets has been required by the Uniform Building Code. At 1.6 gallons per flush (GPF), they use far less water than their older counterparts. Even greater water savings can be obtained by installing a so-called HET, or high efficiency toilet. They use about 1.28 GPF or less, but can be a bit finicky. With some brands you have to flush twice to clear the bowl, obviously defeating the water-saving purpose.
Back in the day, there was the motto “If it’s yellow it’s mellow; if it’s brown, flush it down.” That worked fine with toilets that flushed 3+ gallons of water each time. However, today’s modern versions use less than half that much, and some of the thriftiest models even less than one gallon. This means there is far less water to help transport waste through the sewer line. As you may know, sewer lines generally slope at a minimum of 1/4″ per foot. That’s not much, but as long as there is sufficient water, everything should be fine. If you have a dual flush toilet or one that uses less than one gallon, be sure to flush after each use. If you don’t, you will risk the chance of a clogged sewer eventually.
Another good reason for regular flushing is the issue of ‘hard’ water. According to my local water district, “Water hardness (a measure of calcium and magnesium concentrations in the water) is the result of a natural accumulation of salts from contact with soil and geological formations. When referring to household use, the term hardness is applied to the soap-neutralizing power of the water and is commonly expressed in grains per gallon. Generally, water with less than 4 grains per gallon hardness is soft, water with 4 to 7 grains per gallon is moderate, and water with greater than 7 grains per gallon is hard.” When hard water remains stagnant in a toilet, there is a greater opportunity for calcium and magnesium deposits to accumulate. Over the course of 10 or 20 years, these deposits will begin to clog your toilet’s jets and their ability to flush debris out of the bowl. Again, regular flushing is a good idea, and a fine reason to replace your old toilet with a low flow or eco model.
- Low flow (or green) toilets like those made by Toto use about 1.6 GPF;
- Toto’s Eco Drake uses 1.28 GPF; and
- some other brands make toilets using as little as 0.8 GPF.
Some municipal water districts offer rebates on certain brands and models, so contact them before you make a purchase. I also recommend you consult with a qualified plumber before ordering one that uses less than one gallon. The condition and length of your sewer line may not mesh with toilets using very small volumes of water.
And for general entertainment, check out this motorcycle-with-toilet, built by Toto. Apparently it runs on a biogas (methane, I imagine), produced by animals and wastewater. The motorized toilet was built as a PR stunt to draw attention to humans’ impact on Japan’s environment. Read more about it here.
]]>

We are in the middle of building a new bathroom in a friend’s basement. It is a small space that will house a sink, shower and a toilet. Since there is no window to provide ventilation, the Uniform Building Code (UBC) — and common sense — suggest that a fan be installed. My friend picked the Panasonic FV-08VQL5, a very quiet model that includes a fluorescent light. It is plenty powerful for that small space, and even includes a night light.
I prefer solid sheetmetal ducting over the flexible kind. Sheetmetal is long-lasting and, most importantly, it allows for unobstructed air flow and thus best performance. Flexible ducts contain coiled metal wires to maintain their shape. It gives ducts a ‘ribbed’ appearance, but those same ribs also obstruct air flow. Sure, rigid ducting takes a bit longer to install and costs a few dollars more, but so what? I’d rather do it right the first time. A contractor-friend of mine has this note following the signature line on email messages he sends: “A job once done well is done for ever.” (Thoreau

A few details to keep in mind:
- Most fans allow a maximum duct length, depending on the diameter and on how many elbows are used. Check the installation instructions or give the manufacturer a call.
- Before you start installation, decide where the duct will end. It must be somewhere through an outside wall or roof. I have seen plenty of installations where the duct was vented into an attic or crawlspace, but please resist the temptation to do so. You do not want moisture accumulating in such areas.
- The outlet must be at least 3 feet way from any window, door, or skylight, and any property line.
- When you fasten the duct to the fan, use foil adhesive tape only. Screws might interfere with the ‘flapper’ inside the fan that prevents back-draft. At all other joints, install 3 sheetmetal screws in a triangle shape, and wrap the entire joint with foil tape. The duct can be supported with metal or plastic plumber’s tape.
- It is also a good idea to wrap the duct with insulation and slope it toward the exhaust vent at the exterior wall. That way any condensation that builds up will have a place to go.
Wiring is a breeze. Just make sure you do not accidentally connect the night light to the switch leg. Because my installation will no longer be accessible once the gypboard is installed, I did a dry run to make sure everything worked the way it is supposed to.